Holiday Entertaining
Published in Leawood Lifestyle and Johnson County Lifestyle November 2021

*Silvertooth Home participates in affiliate programs. This means that if you click or make a purchase from links on this page, Silvertooth Home will receive a small commission at no extra cost to you. Thank you for for supporting us in this way.
Styled Collaboration
Several weeks ago I had the honor of collaborating with an amazing collection of people to put together one of my favorite photoshoots for City Lifestyle Publications. We spent the afternoon styling, shooting and presenting to editors with City Lifestyle from around the country. I had the privilege of styling the table, Sarah from GrazingKC styled the food and Janie took the amazing photos you will see here. We did all of this at the Amigoni Urban Winery in their gorgeous tasting room. After the styling and capturing the photos, I had the opportunity to share with the editors why I love contributing to the magazine as a local creative. I hoped to encourage them in their partnerships with local creatives in their own cities and how it is a benefit to cultivate those relationships as well. The final product of this styled shoot is stunning as you will see here. It is also packed with information about how to recreate this look for your own holiday gathering. Below you will find my article as well as the work that made the front cover- such an honor!


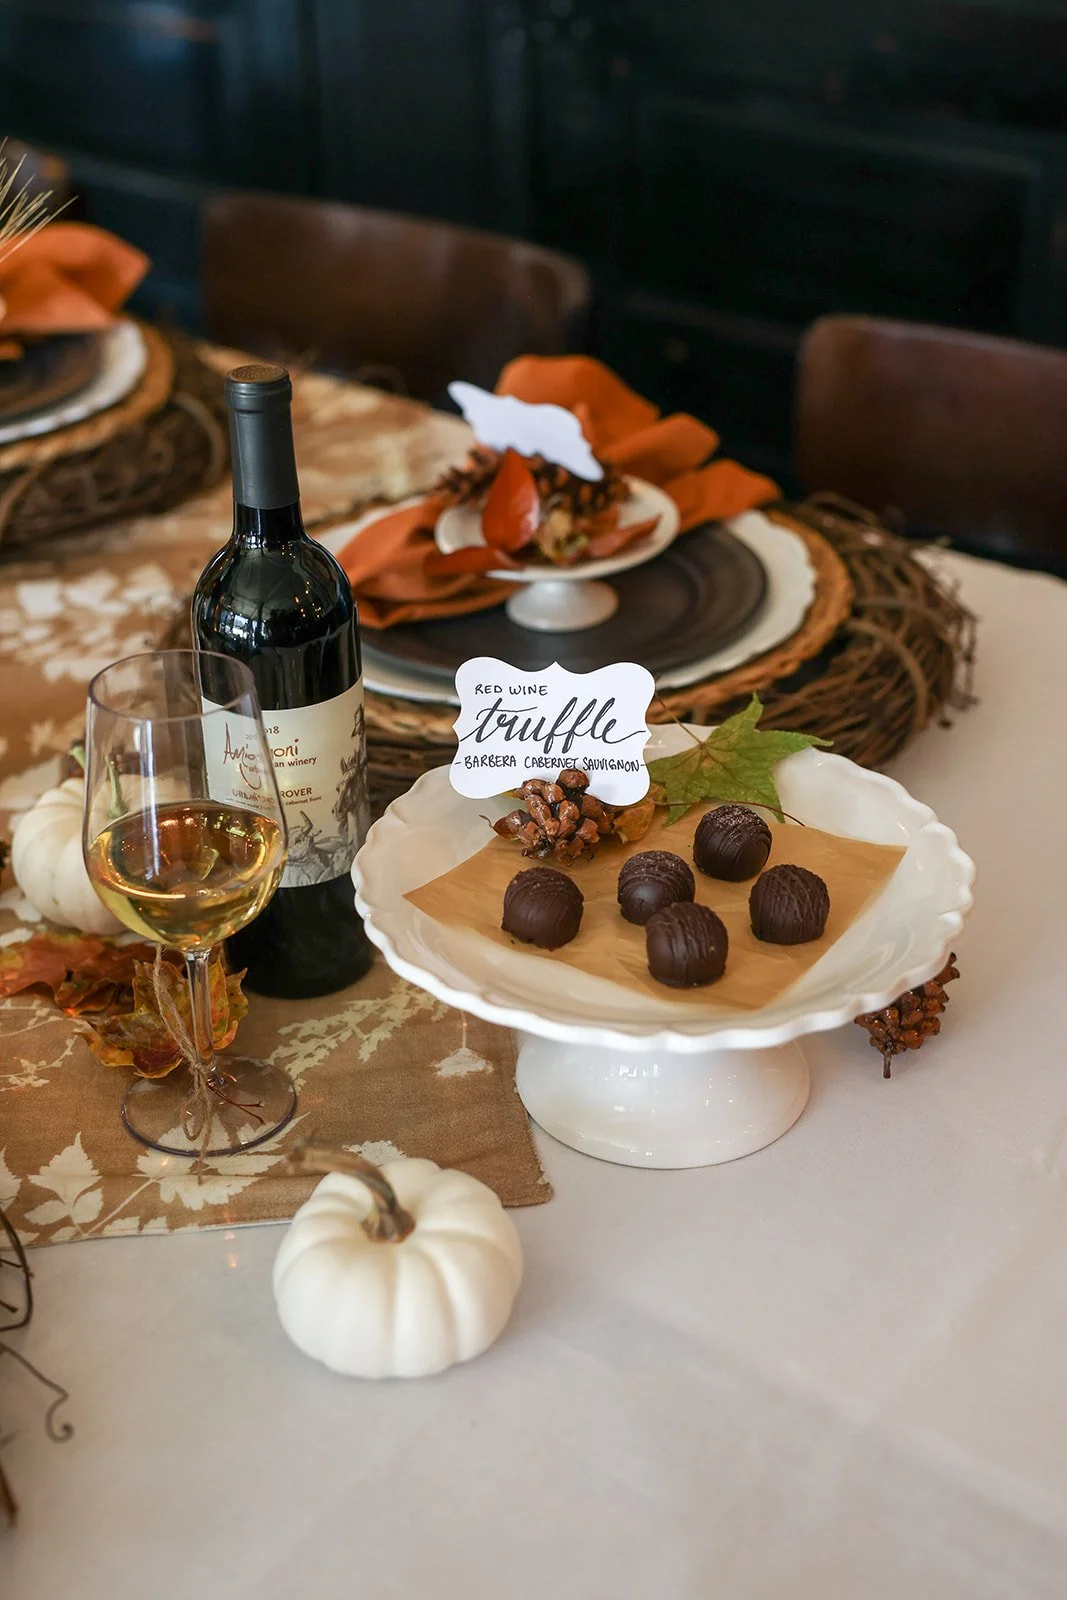
“Gathering with the people we love is a gift whether we find ourselves eating off paper plates or fancy dishes. Even so, adding beautiful accents fosters meaning to the moments shared and can be just as easy to pull together. In this tablescape I used touches of the outdoors with real leaves, pinecones and grapevine wreaths. These simple additions add personality and warmth to any autumn table. Follow these directions for how to prepare outdoor accents (because dirt and bugs are the only ones not invited to the table) and you will have a stunning tablescape that costs you only a leisurely walk around your neighborhood and a passing chat with a neighbor, if you are so lucky.” -LeAnn Parker, Silvertooth Home

How to: Recreate the Table Setting
To recreate this tablescape that I created, you will need one of each item listed per guest. Simply stack in the order listed below.
Black Plate (linked similar)
Ceramic Cupcake Stand (linked similar)
For additional natural accents and centerpiece, I used the items below.
Preserved Pinecones as name tag holders (instructions below)
Preserved Leaves as decor (instructions below)
Small Pumpkins
Vases of Dried Wheat
Grazing Board (assembly instructions below)


How to: Preserve Pinecones
Bake pinecones to remove any tiny critters, dry up the sticky sap, and give the pinecone a beautiful glossy finish. Preheat the oven to 250 degrees fahrenheit. Line a baking sheet with foil and lay pinecones in rows allowing space as they expand when baked. Place in the oven for about 30 mins. If pinecones were gathered on a damp day, it might take longer. Keep a close eye and pull them out when the house smells of pine trees and your pinecones go from a matte to glossy finish. To use simply scatter around the table or use as place-setting card holders as I have done here. For more photos of the process, check out my blog post Pinecones & Leaves.


How to: Preserve Leaves
Gather fallen leaves and test for dryness. Look for mostly dry, not brittle or limp. If too limp or fresh then press between books on parchment paper for a few days before proceeding. When ready to begin, prep the space by placing leaves in a single layer on wax paper. Brush one side of the leaf with a thin coat of Mod Podge using a foam brush. Let dry for 30 minutes or until the white coat turns clear. Flip leaves over, brush the other side and let dry again. Use leaves by scattering them around the table or frame as art for the gathering space. For more photos of the process, check out my blog post Pinecones & Leaves.


How to: Write Place Cards
Handwriting guests' names on place cards gives an extra personalized touch. Start with writing the name with pencil (an eraser is your friend), then trace with a thin tipped sharpie. Finally, go over all the down strokes with a thick tipped sharpie to create a hand lettering effect. Watch the how-to video on IG @silvertoothhome.


How to: Build a Grazing Board
You can’t go wrong with a grazing board for gatherings of all kinds- they are stunning as well as crowd pleasers. Here, Sarah from GrazingKC created this amazing grazing board and shared an easy shopping list as well as some grazing board styling tips so we could recreate a board for our next gathering too. Thank you, Sarah!
Shopping List
3-4 fine cheeses (a variety of soft and hard)
1-2 cured meats (like salami and prosciutto)
2-3 season fresh fruits
1 dried fruit
Nuts
Olives
1 Jam/honey/mustard
1-2 types of crackers
Fresh herbs for garnish
Cheese—Build the foundation of your board with cheese. Add your softest cheese as a full block and pre-cut your hard cheeses by crumbling or slicing.
Charcuterie—Fold salami into quarters and lay the salami throughout the board building around the cheese.
Color—Add pops of color such as fruit and olives throughout the board.
Crunch—In the remaining gaps on your board add crunch such as nuts and crackers.
Garnish your board with fresh herbs and enjoy grazing!


What an amazing collaboration this was to be apart of. Thank you to Editor, Angela Broockerd, for letting me contribute and for all the work that it took pulling everyone together for this event.
Contributor credits:
Located at Amigoni Urban Winery
Grazing Board by GrazingKC
Styled by Silvertooth Home (that’s me!)
Photography by Janie Jones Photography
Published by Lifestyle Publications