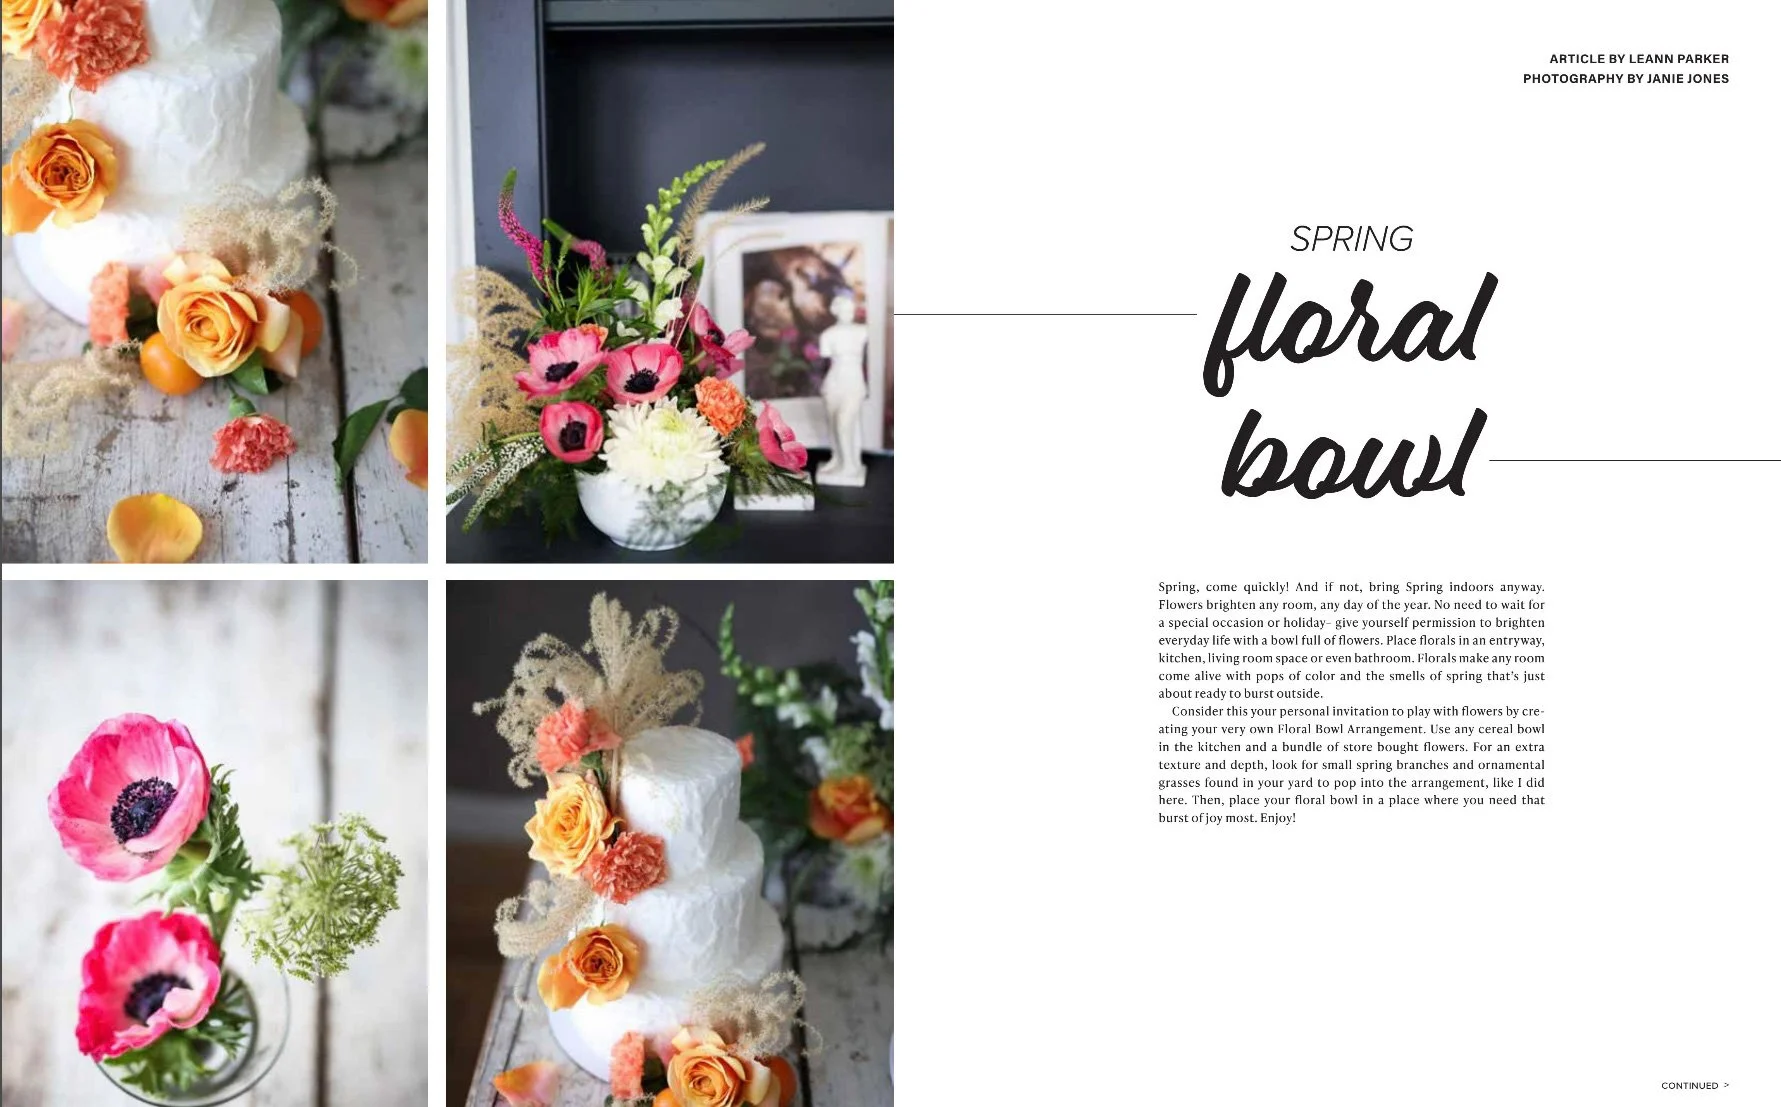
Floral Bowl Workshop

Photos by Janie Jones @uncommon.jane.

Silvertooth Workshops
Silvertooth Home workshops have continued to be held each month since our launch this past Fall. It has been so rewarding to share my love of styling with you in this way and I look forward to many more to come. Since hosting my first arrangement workshop in October (Fall Floral Arrangement workshop), I’ve been looking forward to offer another arrangement class using fresh florals.
With Spring almost in the air we had our first fresh floral arrangement workshop playing with beautiful bright colored blooms. Here, participates learned and practiced how to use average store bought flowers in an everyday cereal bowl to create a professional looking arrangement.
As a prop-stylist, I use florals often and wanted to share my simple tips and tricks that anyone can use with everyday things and feel successful. If you weren’t able to attend this Floral Bowl Workshop but want to learn too, follow along here.
Why Floral Bowls?
I decided to create a Floral Bowl class to teach participates how to create professional looking arrangements for a fraction of the cost and using items that can be found in your home. The process is simple and can be replicated with any flowers throughout the seasons. I thought this was a perfect place to start.
As a prop stylist, I am responsible for curating and sourcing a staged space for a photoshoot. Often, when creating an illustrative story to be told through photos, I use florals to enhance the scene and give it organic life. Although not a florist, I have picked up tricks on how to style flowers for these photoshoots in a way that elevates even the most basic of store bought flowers. Visit my portfolio for a glimpse into some of these prop styling projects. If you are interested in more, I wrote a blog post on floral bowls and the use of faux flower arrangements that you can read for more flower arranging tips as well.


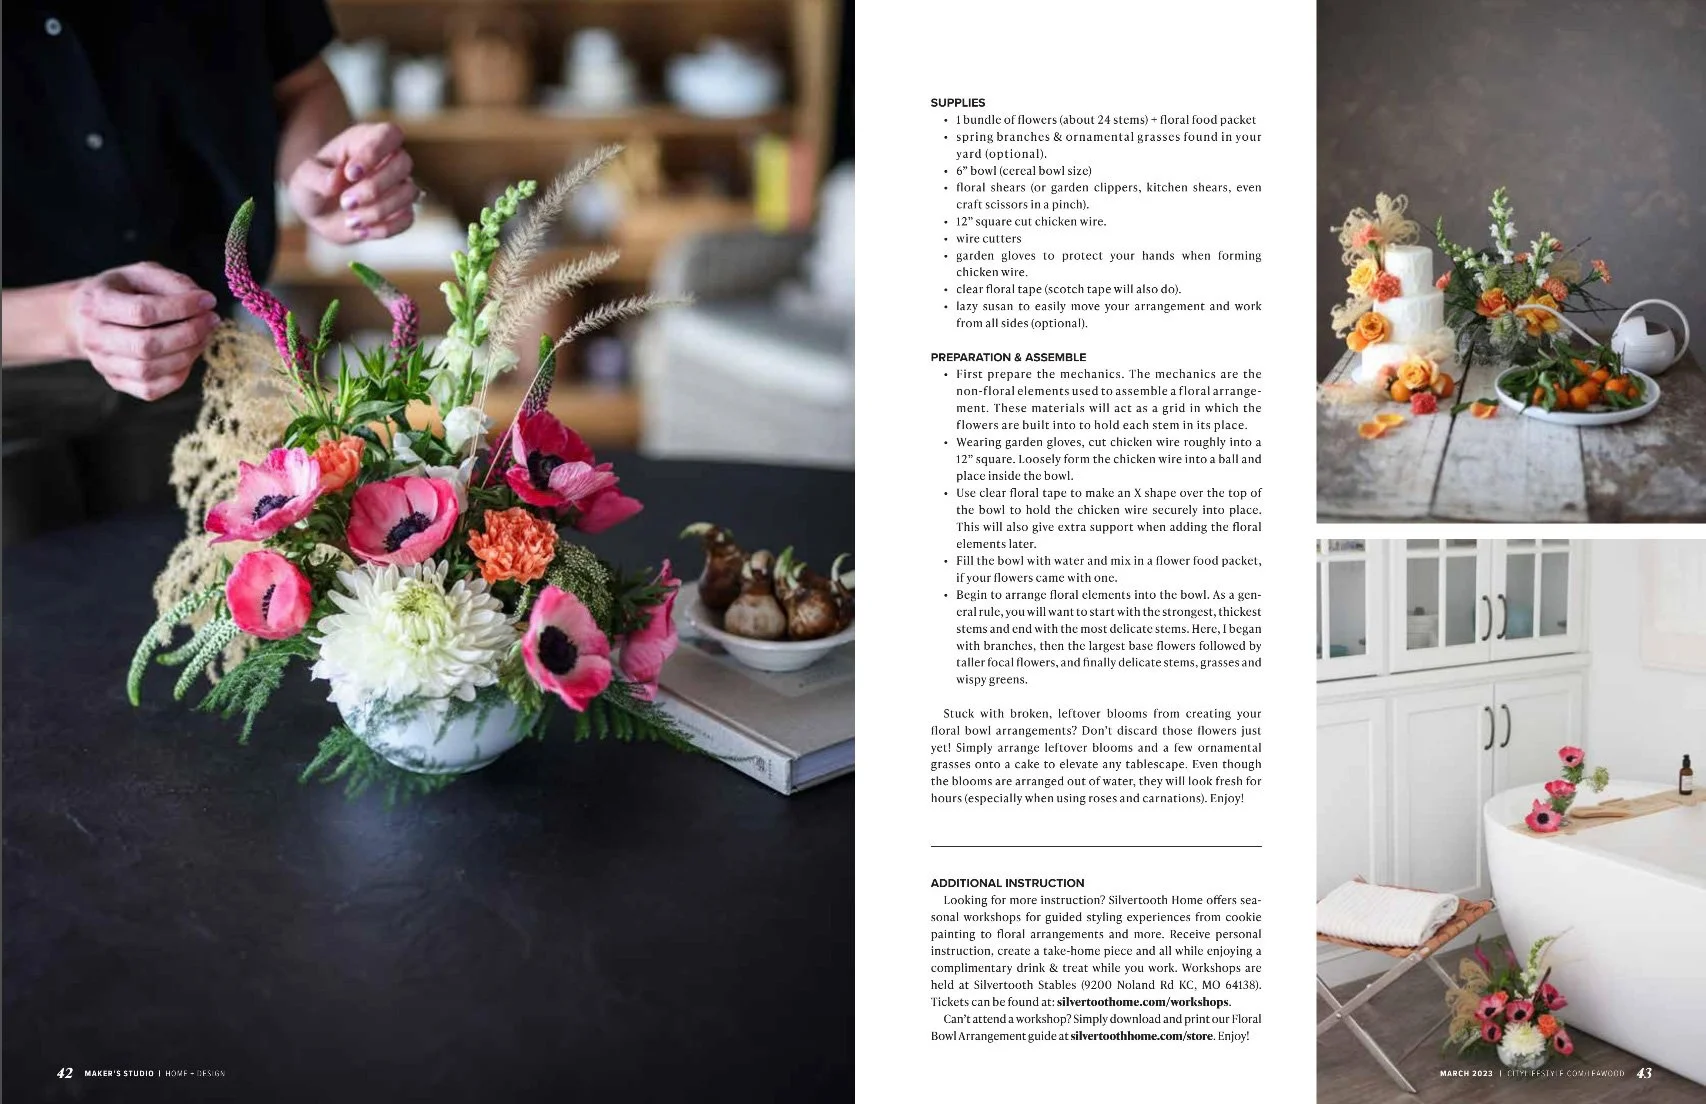
Preparation of the Mechanics
Before building an arrangement you will first prepare the mechanics. The mechanics are the non-floral elements used to assemble a floral arrangement. These materials will act as a grid in which the flowers are built into to hold each stem in its place.
Wearing garden gloves, cut chicken wire roughly into a 12” square. Loosely form the chicken wire into a ball and place inside the bowl.
Use clear floral tape to make an X shape over the top of the bowl to hold the chicken wire securely into place. This will also give extra support when adding the floral elements later.
Fill the bowl with water and mix in a flower food packet, if your flowers came with one.


Preparation & Care of the Flowers
At the workshop I explained how to prepare and care for flowers to get the biggest bang for your buck. We also learned how to forage for additional organic elements to add to a homemade arrangement making average store bought flowers look even more elevated. Here are some care tips:
Care Tips:
When you first bring flowers home, clip the ends and add to clean water for an 1 hour up to 24 hours. Then, when you are ready to build the arrangement the flowers will be in tip-top shape.
Replace the flowers water every 2 days to expand the life of the arrangement.
Do not let any leaves or other foliage sit in the water as it will dirty the water faster.
Remove dead flowers as they fade to make an arrangement look fresh longer.
Bloom Trick:
Here is a sneak peak at one of the tricks on how to create a larger blooms. Working around your flower from the outside inward, pull pedals back gently to expand the flower. This does not shorten the flowers life. This simple trick is my favorite for enhancing an arrangement with a bigger pop of color. Roses and tulips work wonderful with this technique.


The Process…
Now onto the fun part… the floral arrangement itself! At the workshop I taught participants my personal process of arranging flowers. This is a simple 4 step process can be implemented with any seasonal flowers. The steps workshop participates learned were:
The Frame
The Foundation
The Focal
The Filler
In summary, you will want to start with the strongest, thickest stems and end with the most delicate stems. I began with branches, then the largest base flowers followed by taller focal flowers, and finally delicate stems, grasses and wispy greens.
If you weren’t able to attend my workshop but would like the instructions on using these steps too, you may download the booklet from my shop. I hope you enjoy!


What we made…
Scroll through the photos below to see all the beautiful floral bowl arrangements that were created that night using my 4 step arrangement technique. I love how we all used the same flowers and each arrangement turned out so unique and equally beautiful. What do you think?


Where we meet…
Silvertooth Stables is the location for Silvertooth Home’s workshops. It is an honor to use the space so generously allowed by Tara and Ed Adams who own and run the Silvertooth Stable here in Kansas City.
History of Silvertooth Stables
Silvertooth Fahey Farm was built in 1948 by Leigh and Jane Fahey who raised champion Saddlebred horses. At their passing, Ernest and Nonda Wassmann took over the Farm in 1998 and began its restoration. In 2006 Ed and Tara Adams were next in line to maintain Silvertooth and continue to do so today. To this day Silvertooth Stables is a full-service stable operation in a secluded setting that caters to owner and horse alike.
The Silvertooth Loft Project
The loft above Silvertooth Stables was untouched since its farming years until 2020 where renovation began to refurbished the space to host the Adam’s family wedding.
Today the loft is used for neighborhood meetings, private events as well as the official stable for the Jackson County Sheriff’s Mounted Posse (an equestrian volunteer group who serve on horseback to assist in areas that are inaccessible by car or on foot).
Inside you will find original wooden floors, paneled walls and ceiling, stunning light fixtures and even the original hook and lever used to pull in hay in the barns original farming days.
Feature
Thank you Leawood Lifestyle for featuring my Floral Bowls in the March 2023 issue. To read the article click here or on the website here.
Coming up…
There are more Cookie Painting Classes to come this spring if you would like to join us again (or for the first time!).
Next up is our Lemon Cookie Painting Class on Tuesday, March 7th, 2023 | 6:30-8:00pm. Learn the technique of cookie painting. Leave with assorted sized painted lemon cookies as well as tools and instructions for making dozens more painted cookies at home.

Thank you to all who attended Silvertooth Home’s Floral Bowl Workshop. It is an honor to host these events tat bring together friends — new and old — to be creative together. Looking forward to seeing you next time!
— LeAnn